
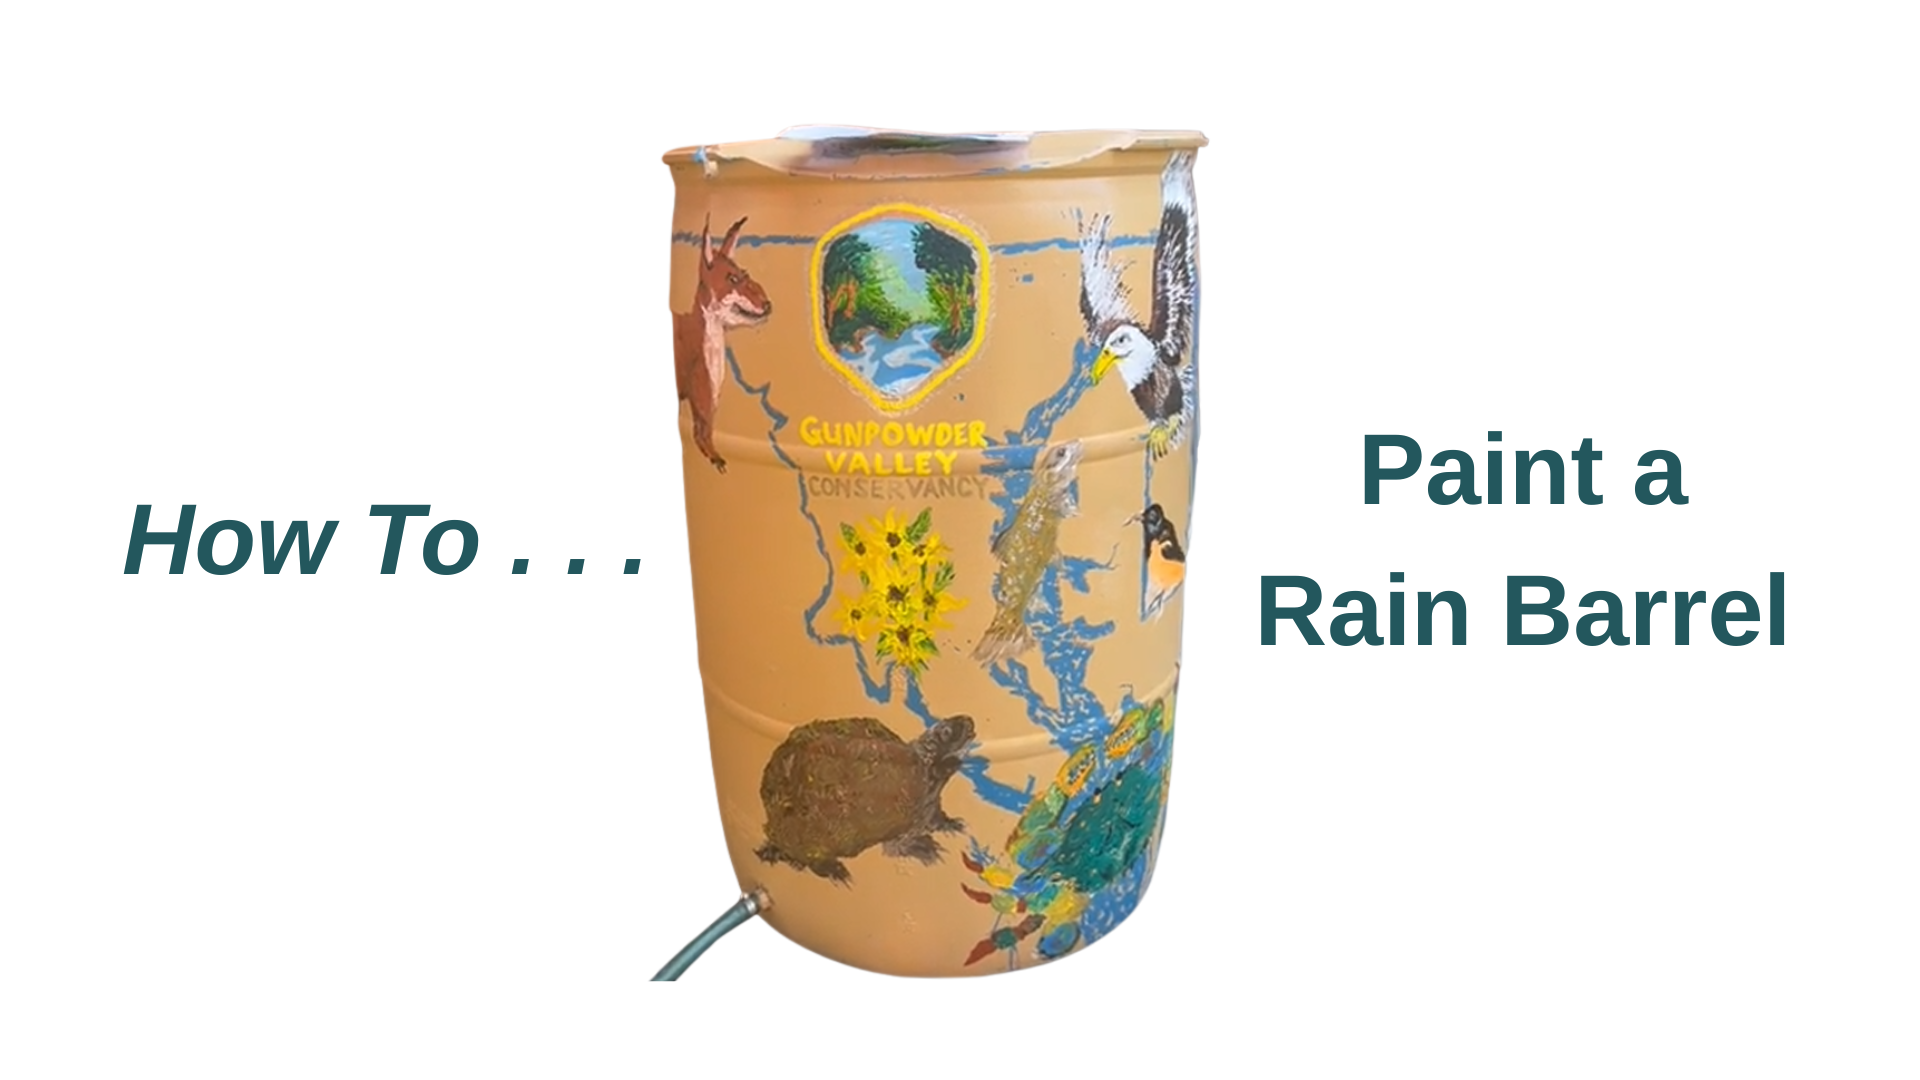
Rain Barrels provide many benefits to local homeowners and businesses, such as:
- Reducing water bills
- Protecting homes form water damage
- Capturing “soft water” that garden plants prefer
- Recharging groundwater naturally
- Slowing down runoff to reduce erosion
We realize, however, that the repurposed, food-grade barrels that Gunpowder Valley Conservancy and other nonprofits offer can be visually…unappealing. That’s why we are excited to share advice on how to personalize your rain barrel and reduce stormwater runoff in style!
This guide was based on instructions compiled by Gunpowder Valley Conservancy volunteer, Connie Pierson. We’re grateful for her willingness to try new ideas and share her process with us.
Need a rain barrel to decorate? We are hosting a Rain Barrel workshop at DeJon Vineyard on September 13, 2026. Participants also receive one drink ticket for a glass of wine with purchase of their barrel.
Once you have your rain barrel, follow the instructions below!
Painting
Supplies:
- A rain barrel
- Microfiber or lint-free cloth
- Plastic cling wrap
- Tarp
- Very fine sandpaper
- Primer spray paint (for use on plastic)
- Spray paint
- Clear coat finishing spray to seal and protect
Steps for prep and applying base coat:
- Clean rain barrel. Wipe off barrel with a damp cloth, making sure that all stickers and residue are removed. Use paint scraper to remove adhesive, if necessary. Clean with an environmentally friendly cleaner such as diluted vinegar. Allow to air dry.
- Lightly sand the entire surface of the barrel that you will be covering with paint. This will help the paint adhere better, even if the paint you purchase indicates that sanding is unnecessary.
- Vacuum or wipe down the barrel’s surface, then rinse it with clean water to wash away any remaining dust. Dry the barrel with a microfiber or other lint-free cloth.
- Wrap the entire hose with cling wrap, to protect it from paint spatter.
- Place the rain barrel on a tarp and apply primer paint for plastic, following the instructions on the spray can. Allow to dry for at least 15 minutes before applying the base coat.
- Apply your chosen color of base coat. You may decide to forgo the basecoat and apply stencils directly to the primed surface. If you are not painting the top of the barrel, use masking tape around the top. Allow base coat to dry for at least 15 minutes, preferably longer.
- For barrels using only basecoat and no further painting decorations, apply a clear coat finishing spray designed for outdoor use to help protect your rain barrel finish.
Decorating with Stencils
Supplies:
- Masking tape
- Adhesive glue stick (optional)
- Paper or plastic stencil(s)
- Spray paint
- Acrylic paint
- Dabbing sponges or stiff paintbrush
- Latex gloves (optional)
Creating paper stencils:
- Search online and print out stencil images. You can also create your own stencils freehand.
- Transfer images to cardstock paper. Simply hold printed stencil image and paper up to window for tracing
- Cut stencils using scissors and/or a craft knife
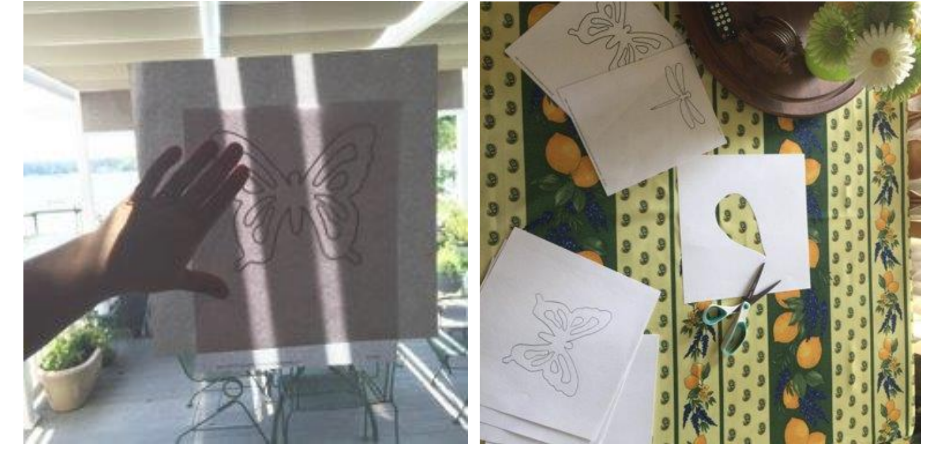
Tracing stencil onto cardstock (left) and cutting out your own rain drop stencil (right)
Stenciling with paper stencils:
- On primer coat or base coat surface, adhere paper stencil to surface using masking tape on two edges to hold in place.
- Use spray paint to lightly coat the open surface areas of the stencil.
- Allow to dry for a few minutes if applying another stencil nearby, otherwise, you can move the stencil to another area of the barrel.
- Repeat to cover desired surface.
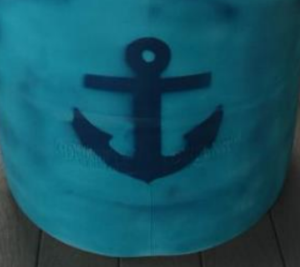
- Mistakes can be covered over with basecoat paint! You can turn your mistakes into extra style, as in the case of the picture below. When the dark paint of the anchor went astray, light sprays of the dark blue paint over the aqua paint were used to create a “watery” effect.
- For loose stencil pieces (the small circle on top of the anchor), use repositionable craft glue or a small piece of tape on the back to adhere the piece to the barrel, and then remove after stencil paint has dried.
- Once dry, apply a clear coat finishing spray designed for outdoor use to help protect your rain barrel finish.
Stenciling with plastic stencils:
- On primer coat or base coat surface, adhere plastic stencil to surface using masking tape on two edges to hold in place.
- Squirt a small amount of paint (about the size of a half dollar coin) onto a paper plate. Dab with sponge brush and then dab on plant to even out paint on sponge.
- Dab paint on stencil and wipe down surface of non-painted side to remove any seeping paint.
- Repeat to cover desired surface.
- Once dry, apply a clear coat finishing spray designed for outdoor use to help protect your rain barrel finish.
Other Decorating Ideas
Hand painted barrels:
- Free form painting using acrylic paint. From experience, if the acrylic paint is applied too heavily, it will chip and peel off over time. Allow the paint to dry completely before covering it with a topcoat
Other materials/ideas:
- A blue rain barrel could be accessorized with nautical rope and netting with an anchor or other nautical knickknacks propped beside it.
- Glue glass beads to your barrel to create a mosaic effect.
- Get the whole family involved! Use acrylic paints and cover the barrel in colorful hands and footprints.
We’d love to see your finished masterpiece! Email us photos of your painted rain barrel installed in your yard and we might include it in future social media posts.